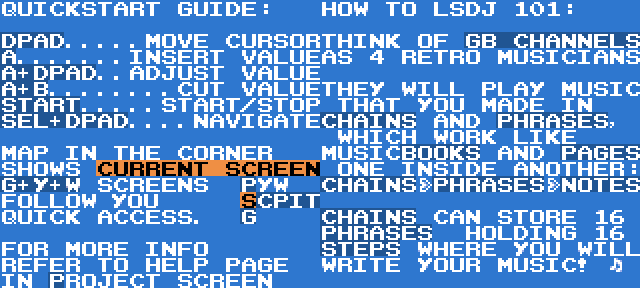
NOTE: this is not intended replacement for full guide!
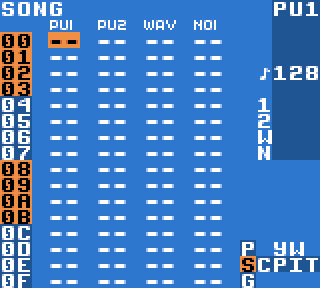
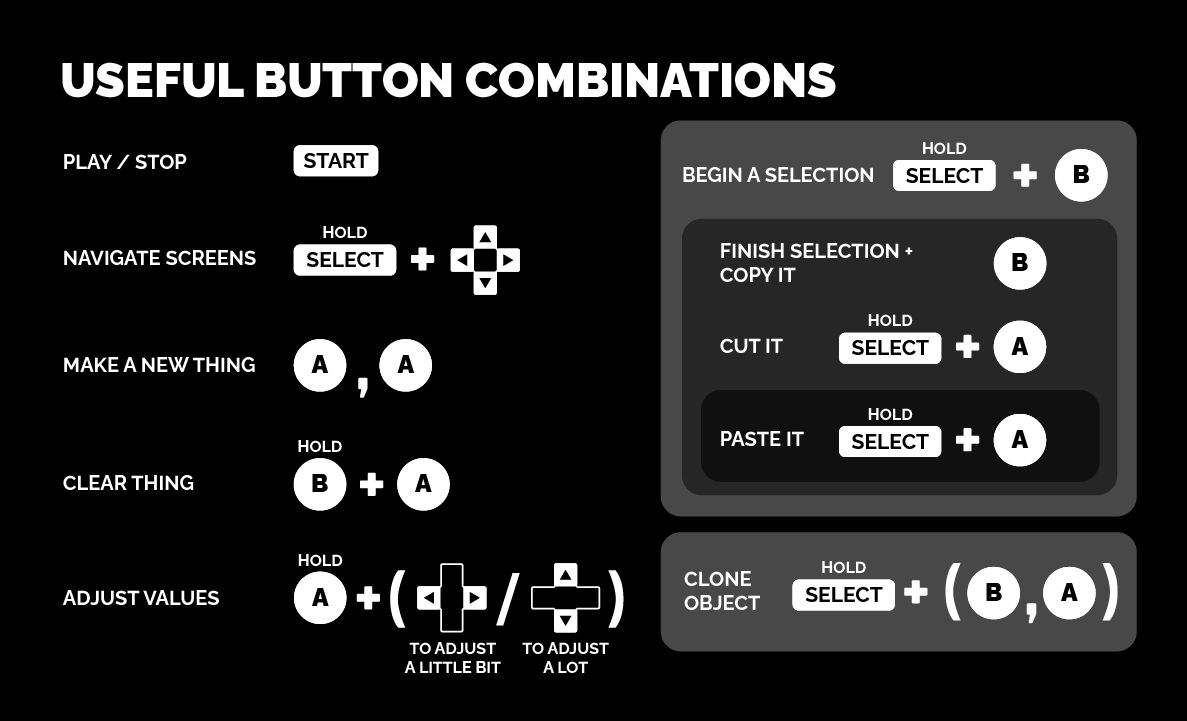
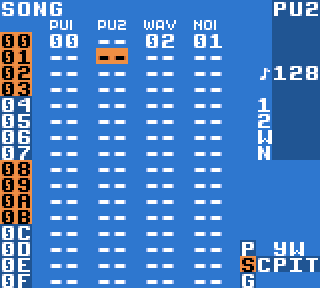
Click here to go back to the main page!Figure 1. Each column is a channel, visible on the Song screen (i.e. PU1, PU2, WAVE, NOI).Figure 2. Useful button combinations. The right-hand side shows selection and manipulation commands.Figure 3. Here are the above steps animated. Note the change in the Navigation Map on the bottom-right!Figure 4. The arrows help point out the Phrase number we are in right now, as well as what channel (PU1) and what position on the map.Figure 5. The note C-2 with Instrument 00 appeared on this Phrase row.Figure 6. An example where the last C-4 note is modified to F-4. Editing one Phrase will change all Phrases of the same number.Figure 7. What you would normally see at the Instrument screen.Figure 8. The second and last box is zero in this case. Note that zero speed as a value is used for hold/sustain.Figure 9. This shows the waveforms/loudness of our Pulse instrument, labelled with their parameters. The bigger the waveform, the louder the instrument is. In later LSDj versions there is a small display that shows the waveform shape. Note: One of these examples is wrong. Can you tell which one?Figure 10. An example of multiple Phrases in a Chain. We will be placing notes in them!Figure 11. While on a Phrase screen you may use the cursor to scroll between Phrases of the same Chain. Note the CPx value top-right.Figure 12. An example of the process of a custom selection.Figure 13. Notice that Hex Notes specify the Interval positions if you start counting from 0. This means that Hex Notes are essentially the same as Scale Notes in this regard. Source: LazierGunz on Chipmusic.org forums.Figure 14. The Command List, found under Project screen > Help. The Help screen notes what version of LSDj is running, and also documents the button combinations possible in each screen.Figure 15. A Phrase screen showing a mix of white noise and metallic noise. Copying the notes from this figure while using the default noise instrument will give you a feeling of how Kicks, Hihats and Snares sound respectively.Figure 16. The left side shows the volume envelope set to Volume 9 with Table 00 selected. The right side shows the resulting snare Table.Figure 17. Table 01 shows a pitch slide that we will assign to our WAV kick instrument.Figure 18. The Synth screen on the left shows the settings we will use for our WAV kick. We also see what the Wave screen looks like on the right.Figure 19. Here you can see how some of the distortion modes affect the waveform.Figure 20. We finally have something going on here. You got this.Figure 21. Here is one of my songs. Note how 7E and 7D appear often in various channels during the song. They serve as silent chains so the song playback knows to keep going/playing. 7E works as a short bridge silence, and 7D as a full length chain silence!